05
Apr 10

Working with epoxy grout. If you dare!

Epoxy Grout has very good properties; it makes an excellent bond, won’t stain or discolor, and is waterproof. I read about this product 10 years ago in a book from Taunton Press, Setting Tile, by Micheal Byrne Dip.  https://store.taunton.com/onlinestore/item/setting-tile-michael-byrne-ebook-077701.html New to tile laying I didn’t want to tackle the complexities of epoxy grout so I went with traditional water mixed grout.  Since then I have done 5 tile jobs including mosaic tiles on a bathroom floor. All the jobs turned out very well but one thing has bothered me in particular; the kitchen floor grout in our country house has stained and looks dirty no matter how hard we scrub. This same grout job was sealed with some very expensive grout sealant. The other grout jobs are still OK because they don’t get exposed to as much dirt. Now I am setting tiles in a kitchen, foyer and bathroom combination using all the same smooth surfaced, ceramic glazed tiles.

In shopping for the tiles I wanted a mostly dark blue 12×12” tile for less than $3/tile. After searching several stores I found just what I was looking for at Lowe’s.

12 x 12" Glazed Porcelain Tiles.

In my excitement I quickly chose #53 twilight blue grout and the sales lady said it only comes in epoxy. I was like- “Epoxy?” She said, “Yeah, people buy it all the time.” Not thinking too much about it and knowing where I wanted to put the tiles and that I didn’t want the grout to stain, I went with her casual recommendation. When I went back to pick up my special order tiles and grout, I ran into a different sales guy in the tile section and asked him something about applying the grout and he says, “Why are you using epoxy grout?” That set off bells, sirens and whistles in my brain but his main issue was the cost; I said I was using 1/16-inch grout joints. He said, “Oh, that’s OK then, it will go a long way.”

1/16" Tile Joints.

This brought back memories of why I never used the stuff to begin with and so my anxiety level increases as I get closer to the epoxy grout application. I never went back to the tile book but instead studied the pamphlet that came with the product. I also went to the Spectra lock website and viewed their video, it seamed simple enough. https://www.laticrete.com/homeowners/products/grouts/stainproof/productid/68.aspx

In the back of my mind though I knew this was epoxy, this is serious, the clock would be running and if the excess grout wasn’t cleaned up in time- my tile job would be ruined! I went online to some discussion groups and these contractors were saying different things, most of them said they would never use the stuff unless their client demanded it and some of them said they would only use it in their own home. This confirmed to me that epoxy grout was the right product but that I would be challenged.

Setting tiles on a diagonal is more work.

In hind sight I would say do not do this job alone on more than 40 square feet at a time. Nor would I use epoxy grout on anything but a smooth surface tile unless I had three people working the clean-up. Deb was with me last weekend and I took advantage of her presence to try my luck at the epoxy grout application. It was 70 degrees in the room which according to the chart would give me about 80 minutes of working time. My joints were 1/16 of an inch, which would cover 80 square feet. I had my 3 buckets of white vinegar and water mixed ready to go, plastic gloves, sponges on hand and cardboard down over areas I didn’t want epoxy tracked onto in the rush. The grout comes in pre-measured packets, an all or nothing mix. I said to myself, “Here goes!” and mixed the grout.

LATICRETE SpectraLOCK epoxy grout kit.

Part A and B before mixing.

Mixing in the Twilight Blue Sanded Grout.

I had about one hour before the final clean up and any remaining grout becomes useless. The directions say start your initial clean up after 20 minuets, the website video shows a guy applying the grout over about 9 square feet and wiping the excess off right away.  Deb does not like standing around waiting while I work so I turned her loose on the clean up after about ten minutes, cautioning her not to spill any water and vinegar on the non-grouted tiles. Soon she was right on my butt for the rest of the job. While Deb was waiting for me she would go back and continually wipe up the tiles.

Deb wiping up the excess grout.

Floating in the epoxy grout.

As time went by the epoxy started to stiffen and took more effort to work into the joints, not a bad thing. The consistency was best about half way through the job or 20 minutes. Much more force is needed to pack the grout into the joints at the end. After about 50 minutes  all the grout was gone,  I was out of the bathroom and into the foyer.   I said to Deb, “After one hour we need to start the final clean up.” She said, “They are clean.” I went into the bathroom and indeed they looked clean. I said we should sit tight and let the water and vinegar evaporate so we can see the dry tile surface. I touched the dry tiles and they looked clean but felt sticky. I said,  “We need to wipe off this sticky stuff and fast.”  We both went to work on the tiles with the scrub side of our sponges. The stickiness went away on some of the tiles and others it didn’t seem to budge.

“Whew!” I was beat.

I wasn’t too worried about the stickyness  because they looked clean and sure enough when I checked the tiles the next day they were clear and felt like tiles- no stickiness. The only thing was some gritty sand residue left around some of the tile edges that you could only feel by touch but not see. This residue could easily by removed with a plastic scrub pad.

Sandy residue needs to be scrubbed off.

Now I just have to wait and see if the epoxy grout hold up to it’s billing.

Finished epoxy grout job.


23
Feb 10

Winter 2010

Deb skis the backcountry. 2010

As I have mentioned in earlier posts, I love to cross-country ski and bought land where I could do it. This has been an amazing winter for backcountry skiing.

The best ski conditions for backcountry skiing locally are these: You need a good base, like two feet of snow; then you need some warm weather and even rain to compress the snow; then you need it to get real cold again, crack cold, for the surface to freeze, giving you a hard, smooth surface for the new snow to sit on. This base should be strong enough to walk on with your boots and for the most part not break through.

The next thing you need is a snowfall of at least 2 inches, or up to 10 inches if it is cold, fluffy snow. With this under you, you are good to go anywhere your skiing ability can take you. No trails, no tracks just you. Sweet!  In these conditions, you don’t need any grooming or broken trail (previously skied) because the snow is light enough to allow you to glide effortlessly, but also gives enough grip to turn or stop. You can even go night-skiing with a headlamp–or moonlight–and not worry about staying on trail.

Having described these ideal conditions, the reality is that, during most winters, they present themselves only momentarily–and usually not when you are available to go skiing. This winter–from most of January on– the conditions have been ideal. We only had one heavy, two-foot snowfall, but that was the one that thawed and then froze. Since then, we’ve had other thaws and rains, but always followed by a freeze and 3 to 5 inches of light snow.

Deb and John on our private mountain ski trail. Feb. 2010

In the Northeast you just can’t go out in the woods and x-country ski, especially in a Northeastern hardwood forest. Storms are always blowing down branches and  trees. You may start out on what looks like a trail but you will soon be frustrated and run into a tangled mess.

So after a few winters of doing this, I developed a trail that sort of circles part of the mountain we live on. It starts and ends on our property but travels through neighboring property.  It was a lot of fun discovering the route, making it visually interesting and challenging, but also safe.

The amount of work needed to clear it was also a consideration. The Western side of the trail is easier and safer and the eastern side is more challenging. So when ski conditions are an issue we usually take the Western half of the trail, that side also has the vista in the top photo. Maintaining the trail is a big challenge.

I usually go in before deer hunting season and clear most of it. There are always several places where a tree has fallen down and blocked the trail. Then after deer season, if the snow isn’t too deep, I try to walk it one more time with my chain saw. The upside to clearing the trail is good physical conditioning for the upcoming ski season. It is a lot of work– all for the pleasure of having an unimpeded ski through the wilderness!

Along with removing the forest litter, the problem with backcountry skiing in the Northeast is breaking trail.  After a heavy snowfall, skiing our backdoor trail system can take two hours of hard slogging. We do it for the exercise challenge as well as the love of being outdoors in the cold winds and heavy snowfalls. We don’t do that hard slogging it for the love of skiing– because we aren’t skiing.

On the other hand, during perfect conditions–such as shown in these pictures–you can complete the trail in just under an hour.

I am not a big fan of x-country ski centers because you have to travel to get to them and then pay.  Backcountry skiing –which is what we do out our backdoor –is usually harder in that you have to break trail. The downside to backcountry skiing is that, without a groomed trail,  you don’t often achieve that classic “kick and glide” rhythm that is particular to cross-country skiing. But there is a plus side for a heavy snowfall on an unbroken trail–going down hill. Unlike alpine skiing, cross-country skiing down a steep slope is tricky, if not treacherous, due to the speed factor, the lack of heel bindings, and the difficulty of controlling the skis. But when you’re slowed down with all that thick powdery snow, you can ski down steep slopes. This is a big rush for me, but also a big workout.

Since 1995 when I first bought our property, there has not been a winter when I couldn’t ski at all. Keep in mind we are traveling back and forth from the city so our presence in the woods is intermittent, but I remember one winter that we didn’t ski till the end of March.  Then there have been winters where it would snow heavily, so we would break the trail over our three days there, only to come back the next weekend and have to do it all over again! Then there are the times when we get the trail broken nicely and it thaws, rains and then freezes like hell — but doesn’t snow.

Not being able to get out and enjoy the weather and the country is a huge disappointment for me. So I’ve come up with the answer to the question of how to extend the ski conditions — using a snowmobile for trail-breaking. I was bound and determined to get a used one this winter, seeing as how I had a new garage to store my toys, but I ran out of money. November 2009, deep in Recession territory, was my worst month ever in 20 years of freelancing, so the toy was not realized.

Back in Chautauqua County where I grew up and first started skiing, I used to hate skiing on snowmobile tracks. The problem is not the drive belt but the steering skis of the vehicles, they make ruts. Hence, cross country skiers are always trying to avoid them. These ruts cause more wear and tear on your joints, and cause you can to cross up your skis and trip if you don’t concentrate.

So why a snowmobile if I hate the tracks so much? I want to make a drag sled to tow behind it. This will even out the trail for x-country skiing, I believe.

Fortunately, the winter of 2009-2010 has not been the kind where a snowmobile is needed to kick and glide!

Back in the days when I skied in Chautauqua County, we didn’t need a snowmobile to break our trails because there were always other skiers using the trails, keeping them open. Snowmobiles weren’t even allowed on the part of the Overland Trail (county property) we loved.

Here in the Catskills, no one else knows about my private trail in the mountains and even if they did I doubt if people would use it and help keep the trail broken. It is too out of the way and most people don’t want to work that hard.

Speaking of working that hard, that’s why x-country skiing has a bad rap. Too much work, “Isn’t it like hiking?”

I saw a notice in the paper about a local x-country ski club and I thought it would be interesting to hook up with them. It turned out to be a fun day,  weather wise we got about five inches of snow during the outing and they were enjoyable ski lovers. But they weren’t backcountry skiers. Every weekend they go to a different trail but these trails are the same ones used by snowmobiles.

Cross Country Ski club.

The leader and organizer was a retired school teacher who coached the local high school x-country ski team. Everyone was over 40, they were all mostly dressed in ski racing attire, tights, light narrow skis and no gaiters. A couple of times I left the trail to explore and no one followed. It is foolish not to wear gaiters when you ski like this, my companions all came back to the start with snow packed around their ankles in their ski boots. My feet were dry and warm as could be.

This group is social. Each week someone is responsible for providing refreshments at the end. We had coffee or tea and a variety of delicious desserts.  I was hoping to introduce them to my private trail but wasn’t sure about their mindset in regard to the spirit of backcountry skiing. I do know that my trail is very interesting with some nice vistas, a variety of terrain and some very cool downhills. In the future I would like to revisit this group.

So much for those great x-country ski conditions. The last week of February we had over 40″ of snow. I went out and slogged around–tiring, but yes, beautiful. I have been telling myself to get those snow shoes. This was the perfect storm for them. Buy a used snowmobile for $2,000 or spend $125 for an average pair of snowshoes and break trail with those. Hmm…. what should I do?

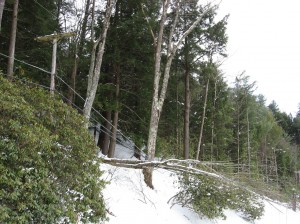
Afraid to see what trees have fallen over and clogged our trail.  The power was out for over five days.

Downed power line.


07
Feb 10

Submersible water pump installation.

Shallow wells are not that uncommon in this neck of the woods nor is it uncommon that they go dry. Towards the end of the summer of 2007 our shallow water well almost went dry. It was OK to take a quick shower and do a few dishes but no more than that. If we wanted to do the laundry we needed to time it right. Our well had always been good, even in the dry summers, but not this year. It was only my wife and I who were using the water–and part time at that– but as I was going to soon get the guest bedroom habitable, I was thinking about the future. We couldn’t have a guest staying here and run out of water.

A Rotary Hammer Drilling RigIn the spring of 2008 I had a deep water well       drilled – and it was deep, 620 feet. We are at 2300’ elevation and about 500 to 600 feet above the river valley floor below, meaning the water table was down to the valley.  The driller hit water at 400 feet, but the flow was mediocre. Drillers want to get a flow of at least 10 gallons per minute (GPM). At the time they were charging me $10/ft. , so it is in a driller’s interest to drill as deep as possible. Yes, you are at their mercy. The driller told me in advance how deep he thought the well should be, based on the other wells in the area. So it was looking like it would cost over $7,000 to drill the well and he wanted another $4,000 to complete it. By completing it, we’re talking about the pump, pump wire, poly pipe, digging the trench and breaking through the concrete basement wall to connect the pipe to the pressure tank. I said, “OK. But for now just drill the well.”

Needless to say, I decided to complete the well myself and did it for a total cost of about $2,000 and a lot of anxiety. The problem was I didn’t know how to do it and I couldn’t exactly ask the well driller. Why should he tell me?  My only experience was years ago, when I had helped pull a submersible pump that needed repair from a cattle well out in Montana, but that was it. I found that neighbors are usually happy to offer their wisdom. It’s also possible to get information from the plumbing supply place  when you go to buy your pump–but in my case, the supply place led me astray on the wire size. The best thing is to educate yourself by getting information from multiple sources–most especially the pump manufacturer. Just go online and search “installing submersible well pump.” Make sure to compare several sources so you don’t get led down the wrong path.

12-2 Romex, 12-2 UF and #10- 3 wire pump cable.

The pump manufacturer’s site will tell you what size pump is needed based on how deep your well is. They can also tell you what size wire to run based on the pump horsepower and well depth. There are charts for this online also. I bought a Myers, Predator 4”, 2 Horse Power, 220 Volt pump. I needed a 220 Volt pump because my well was so deep. Because the pump was 220 Volt, I needed to run 3-wire cable. Pump wire is special wire that can obviously be under water but it doesn’t have an additional heavy covering over the twisted wires, (i.e. Romex or direct burial UF wire).

The static water level, meaning the level at which the water will reach when no one is drawing water for a period of time, was at 390 ft. I figured this out by dropping a rubber ball attached to a line and measuring it, several times. I did this myself after the drilling rig was gone, because I don’t trust people until they prove they can be trusted. Someone who gets paid by the number of feet drilled makes me wary because I can’t see the results myself. So while I was at it, I also measured the total depth of the well–not easy to do; it took several attempts. I was happy to see the well was in fact what the driller said it was–620 ft. Since I was also at the driller’s mercy for knowing the gallons per minute the well produced, I also wanted to measure that.  You think the driller measures this with a meter? No they don’t–they estimate it by looking at the water flowing out the top as they are drilling. To complicate this, they are at the same time pumping water and high pressure air down the drill pipe and out through holes in the drill bit in order to force up the cuttings. Anyone who has done this for a while can eyeball the GPM. Most of these drilling companies are family operations and the sons and daughters grow up watching the returns. Of course I didn’t have that advantage.

The driller said the pump should be set at 500 ft. (for sediment reasons, they don’t put the pump at the bottom of the well).

In my case, the driller didn’t think there was enough GPM when he first hit water at 400’, and he didn’t stop at 500’ where he recommended the pump be placed. He drilled to a total depth of 620’. The theory is that even though the pump is at 500’, the water in the surrounding rock formation is putting out pressure forcing the water into the hole, up to the 500’ pump and beyond, at the same time that the static water level is dropping in the hole when you are drawing water. I have proof that this happens which I will explain later. The pump uses the water to cool itself so you never want this type of pump to run out of water, as it will burn out very quickly.  That is why drillers want at least 10 gallons per minute and your pump shouldn’t be rated for more than that output level.

There is another very good reason for putting the pump at 500 ft.: after 500’ you can’t use poly pipe. Rigid pipe is recommended or required, and it’s much much more expensive. The other thing is that you are not supposed to use #10 wire past 400’ for my 2HP size pump but you can get away with it to 500’. Getting away with it was not something I wanted to do so I ran 400’ of #10 wire and then spliced on another 100’ of #8 wire at the top. I don’t know how good of an idea that was but it couldn’t hurt, I decided. I had already bought the #10 wire and then found out by looking closer at the chart that they recommended using #8. The plumbing supply sales guy said he talked to the pump manufacturer and they said #10 wire should be fine. They would not exchange the #10 for #8 since it had been cut off a large spool. They didn’t even have #8 pump wire. It was not easy to find.
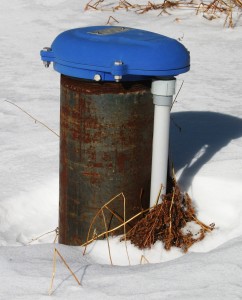
Steel casing, well cap and electric conduit.

My well has 60’ of casing on top, which I had to pay $15/ft. extra for. The driller will determine how much casing is needed, based on the formation and when he hits bedrock. Each steel casing is 20’ long and 6” in diameter. The driller attaches a special drive shoe on the first length that goes into the hole, ($100) and then screws on each subsequent pipe.  As the casing is lowered into the hole, it is rotary hammered down with the protective drive shoe leading the way until bottom is hit or the last piece of casing is less than two feet above ground.  The pipe is called surface casing, which keeps out contaminated surface water. This is necessary because even though the well is in a supposedly pristine area, there are animals that defecate and contaminate the surface water. You definitely don’t want that surface water–or anything else–to be going down the hole. Once the surface casing is set, the driller puts on a smaller bit to fit inside the surface casing and drills the rest of the well.

When they drill gas and oil wells they actually pump concrete under high pressure down the casing and wait till they see the cement come out around the outside of the casing at the surface. That way any cavities around the outside of the casing are completely sealed with concrete.  Oil and gas well surface casing is over 400’ deep. When they continue drilling and hit the pay zone, 4” steel casing is run almost to the bottom and again concrete is pumped down the casing, followed by a rubber plug and the exact amount of water, until they get cement returns out on the ground above. This seals off the oil and or gas from the ground water for the entire depth of the well. In unusual drinking water well situations, they may cement or grout the surface casing but not the rest.
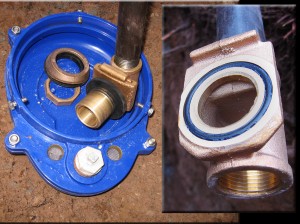
Pitless adaptor assembled, before insertion down the casing.

The most interesting device of the whole water well drilling process is what you install after you get your pump and wire size all figured out–it’s the Pitless Adapter. This is what allows your well to remain sanitary and prevents the water from freezing  in winter before it gets to your house.

Drilled casing for pitless adaptor.

You need to excavate below the frost line–in the Northeast that’s four feet. Drill out the casing to the size hole that fits your adapter.  Slow down when you are breaking through to make sure your pilot bit holds onto the steel cutout and it doesn’t drop down the hole. Buy some black pipe and make your own T bar for lowering the adapter down the inside of the casing. Slip the nipple through the hole and make your connection.  The Pitless Adapter makes a very nice seal around the casing and I did not use any sealant. You don’t reef on the fitting to tighten it or you will ruin the rubber gasket. Just make it nice and friendly tight.

Hook up run to the house, water & electric conduit.

Even though you don’t have to run conduit for your electric wire, past experience has taught me that direct burial wire has its own problems, so I prefer to use conduit. This way, if ever there is a problem, I don’t have to dig up the wire and if I do, it is protected. Same with the poly pipe. I ran it inside a piece of 2″ schedule 40 PVC pipe and used a 4″ piece of drain pipe to slip over the end.

Heat shrink connectors, #10 wire.

After I had my Pitless Adapter installed and the trench back-filled, it was time to get my pump ready. I needed to connect the wire to the pump by using heat shrink water proof crimp connections. I very carefully used a  propane torch. A heat gun would be best or even a lighter. If you have never done it before, make a test splice first. I started in the middle and worked my way out till the sealant oozed out the end.  This is #10 three wire with ground because it is a 220 Volt pump.

Testing the pump. "Just make sure it works."

The pump manufacturer will recommend you test the pump first. They have some complicated instruction about using an ohm meter and lifting it in and out of the water checking the resistance. I called them and was told to just make sure it works.

The torque arrestor.

When the pump starts, the motor spins and creates torque. The Torque Arrestor is designed to prevent the pump from spinning and slapping against the well wall or spinning off completely. The TA must be expanded– but not so much that it doesn’t fit down the well. The strain relief cable is attached to the pump eye bolt and everything gets taped around the pipe. Forget these orange ties you see in these photos, they were cheap and broke off (box store). Buy goods ones if you want to go this way.

The backflow check valve.

The backflow check valve should be installed every 200′. Notice these hose clamps are alternated. I believe these opposing forces create a tighter connection. Get your hose clamps from a plumbing supply house and not a box store.  The cheap clamps will pop just when you like the tightness. I had to use a propane torch and heat the ends of the poly pipe for all my connections to slip onto the brass fittings. Maybe that was because of the 200lbs test pipe I was using for the depth.

The Contraption!

This is my pride and joy. I called it “The Contraption”. We are talking 500 feet of pipe and wire here.  That is a lot of weight so I wanted a gradual bend from a stable feed point.  I secured The Contraption by screwing it to steel stakes, driven into the ground at angles. You don’t want to let the pipe and wire scrape against the side of the casing, so The Contraption is what I came up with.  I have the end of the poly pipe and strain relief tied off on my Jeep way back behind the house.  My wife, Deb, was at the wheel and I was talking to her on a 2 way radio as she creeped ahead, feeding me the pipe, wire and rope, all laid out smoothly on the snow. We stopped every 20′ and I added a circular plastic bushing to keep the pipe and wire off the well wall.

I am glad it snowed before we did this because it kept everything cleaner.
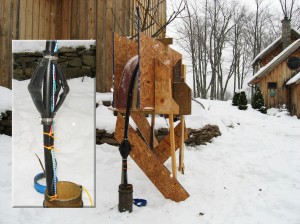
Torque arrestor going down the hole. I put a piece of old carpet over The Contraption slide to soften the contact and give it some slight friction.  When the pump hit the static water level there was a noticeable difference, it went down slower and got lighter.
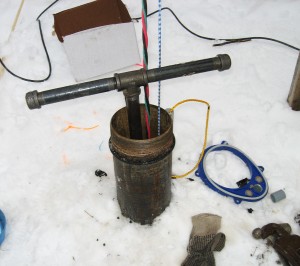
My homemade pitless adapter connection tool.

My anxiety had gone as the pump was being successfully lowered down the well, I was even jubilant.   Deb’s aggressive driving didn’t even bother me as we missed a few spacer bushings. But now I was at the end of the pipe and the apprehension rose as I contemplated making the Pitless Adapter connection. The thought of the whole works dropping down to the bottom of the 620′ well terrified me.

In the end I was happily surprised that I could, unassisted, pick up the T-bar end and slide the Pitless Adapter in place. There was still tension on the strain relief as I did this. When I bought the 500′ spool of poly pipe I could barely get it into my jeep it was so heavy, not to mention the #8,  3 wire and pump.   Never having done this before it was quite exciting. I was very relived in the end to say the least!

Making the pitless adapter connection.

After you slide the Pitless Adapter into place you simply unscrew your T bar and marvel at the results.

I bolted a rope tie clamp to the inside top of the casing and secured the strain relief there, keeping it as tight as I could.  The plastic rope was sold to me by the plumbing supply place and they said it was strong and used for this purpose by everyone.

Since this was a new well I needed to flush it out.  So before hooking up to the pressure switch I made a temporary connection to the breaker panel and turned on the pump. It was an intense moment as I waited to find out if the pump would actually work and after a few seconds dirty water came gushing out the pipe. Yeah! I let the water run for a few minutes as it cleared and shut it off waiting for an hour then letting it run again. I actually did this a few times each day over a number of days till I was satisfied.

I learned that if you let the water run too long at full force for say 12-15 minutes, the smell of rotten eggs becomes noticeable. This is sulfur in the water and you can taste it. The driller told me that he started to smell sulfur at the end of his drilling but he  wasn’t sure if the smell was coming from the water in his tank that he was injecting into the well to remove the cuttings, or from my well.  I stopped running the water full blast for longer than 10 minutes and the smell stopped. So I figure what was happening was this: as the static water level is lowered by pumping, sulfur laden water from the bottom of the well is being pushed up to the level of the pump. If you don’t tax the well inordinately, the sulfur water never reaches the pump. As the static water level recovers between uses, the pressure from higher up, non-smelling, good-tasting water, keeps the sulfur water down where it belongs. After using this well for over 9 months I only smelled sulfur once and that was because a garden hose was forgotten and left on.

So for all you skeptics out there–including me–this supports the driller’s reason for going so deep. If the well wasn’t so deep my pump running full blast for 15 minutes would run dry and burn up!

The tank T and pressure switch.

All the parts in this picture are necessary except the white union on the left. I just like the flexibility to make changes quickly. I have learned that I don’t always think of everything and plans change.

The bigger your pressure tank, the longer your drawn down water volume before the pump kicks on. Your pump will last longer if it doesn’t cycle on and off to much. This is a WellMate 87 gallon fiberglass tank. It has a 29.5 gallon draw down at 20/40PSI.
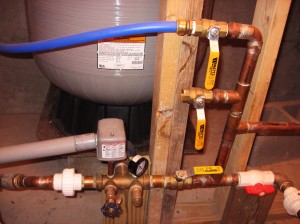
The tank T and distribution arrangement.

Everyone’s needs are different but pictured here is my distribution arrangement. The best thing to do is go to your Plumbing Supply place and lay everything out on the counter, making sure your adapters and everything fits together.  As I was doing this,  I had a few friendly, professional plumbers walk by and throw in their 2 cents. I highly recommend brass ball valves and only used the 1 inch white PVC valve on the right because I had one lying around and wanted to try it. Like I said before, because of the unions I can take this all apart and make changes easily. When this was all done I only had one small drip and it stopped within a few months. Small leaks will sometimes do that. I just put a small plastic container underneath the fitting and let the water drip. The leak was so small the container never filled more than an inch and the water would evaporate. Now the floor is always dry.

Just a final word on price. In building my own house I usually  have had to fight to get contractor prices on things. I use the box stores as a benchmark for price and go from there. The box stores in our area used to almost always be the cheapest but in the last few years I have noticed that to be changing in all facets of building supplies. Vendors in the past who could care less about your piddly little project are now  interested in getting your business and will quote a competitive price. In the past I have dealt with places that would give me a good price on a whole project but when I went back six months later for something they forget who I was and put the screws to me. So always stand up for yourself and don’t take past pricing for granted.

24
Jan 10

The Garage 2009

20' x 30' x 10' Garage

Although this project is asleep for the winter, it is alive in my heart and has been a long time coming.  My first garage on this property, which was going to be a staging area for the construction of my house, burned down in 1996.  After the fire, my direction was lost–and lo and behold a house emerged from the ashes (shown on my front page).  In the spring of 2010 I will start the siding on this garage.


The garage interior.

Having a place to keep my plow is so nice. I use to keep it covered with tarps; had to dig it out after the storms and pray that the engine would start. This is a 1986, 3/4 ton Chevy. Don’t ever buy one! It backfires and causes me ongoing headaches. I have tried to replace it, but in the time it takes me to find a reasonably-priced used one, I figure out how to get this piece of crap started. Usually, that happens by replacing plug wires that the leaking exhaust manifold burned out.

The big deal in this photo is the sheet-rock ceiling. I never dreamed the garage would be insulated, with R30 and 5/8″ sheet-rock installed  by now.  I had time to get this part done in November and December of 2009. The upside to the Recession is Lowe’s had a sale on 24″ insulation–30% off. These are 4 x 10′ long sheet-rock panels. I installed them myself with the help of my trusty back hoe, raising up the sheet-rock very carefully with the front bucket. I paid to have the garage door installed and it was done December 31.

The Back Hoe Shed.

Having a haven for my Back Hoe was a dream come true. See how happy it is? Check it out, there is a chunk of cement bolted to the front bucket for winter ballast, and I’ve added tire chains on the front and back. In the winter you can’t drive this thing around without all that. It’s a two wheel drive. I only use it for special situations in the winter, like digging out a stuck plow or using it to plow when the snow banks are too big, etc.


18
Jan 10

A Wide Plank Floor: from cutting trees to installation

This is 13/16″ Hardwood Maple Flooring produced from trees on my land. I like the fact that I can actually see the tree in these boards. The dark area is the result of staining caused by different factors as the tree grew. This contrast will mellow out and become much less noticeable as the floor ages and is exposed to light. I’ve seen strip flooring with a mix of light, dark and a few knots sold in stores called Tavern Grade. Since my house is in the mountains and surrounded by hardwood forest, I decided to try my hand at making my own flooring.

It was not an easy project. To do it you would have to be in love with the idea of harvesting trees from your own land and making them into flooring. It’s very labor intensive and time consuming. In the end, the money you save is meaningless. I could have bought hardwood strip flooring off the shelf for around $5/sq. ft. and be done with it in 2 days. But I went another route and not working consecutive days this job took over 2 weeks. The motivation has to be something more than cost. I really don’t expect anyone will take on this project. But if you do, I would love to hear from you.


Hardwood Maple logs on the left and two Black Cherry logs on the right.

 When selecting a tree to cut down, you should look for one that is straight and big enough in diameter to give you 1″ x 12″ x 10′ planks. I like maple and have lots of it on my property. As it turned out, these were not the best logs in the woods–but unfortunately you can’t always tell until you cut into them. Two cherry logs are on the right–destined for other use. These logs are not hard maple; they are considered soft maple or silver maple. Because of logging by previous owners of the land, there are not nearly as many hard maple as silver maple trees. I asked a friend of mine, Danny Hicks, who owns a furniture factory back home, about the difference between hard and soft maple. He said, “They are both pretty damn hard!”

Bandsaw Bob’s Wood Mizer band saw mill.

I hired a portable band saw mill owner who first trims the log into a 12″ x 12″ x 10′ beam and then slices that up to individual one inch planks. 

Air drying the planks.

You need to stack and sticker the wood in a place where there is summer shade. The stickers allow air to flow through the pile and let the planks dry. The wood should air dry for at least a year before you complete the drying process in a kiln. This slow drying helps prevent warping and splitting. Make sure you cover the top of the stack to shed rain. If you have high humidity, you could re-stack the pile 6 months in to prevent fungus from growing under the stickers. If left long enough, fungus under the stickers will grow deeper into the wood and create a permanent dark stain. Bandsaw Bob charged me $350 to cut this stack of lumber.

Dehumidifier Kiln with light bulb heater.

This is my homemade kiln. It consists of a light bulb heater and a dehumidifier. The dimensions of the kiln are 4’x 4’ x 16’. It is insulated and has a 4 ml plastic vapor barrier behind the visible OSB.  There is a temperature-activated cut off switch for the light bulb heater, which is set for 95 degrees. The dehumidifier drains outside through a plastic tube–necessary and convenient since I am away for extended periods. After air dying the one-inch planks for a year it takes about 4 weeks to dry this stack down to less than the recommended 6% moisture content in this dehumidifier kiln.  I set the dehumidifier for constant the first couple of weeks, and then reduce it to a 2-hour on off cycle for the remainder. The electricity to run the kiln during that time cost me roughly $25 but that could vary depending on the outside temperature. I usually have a bigger stack than this. The cherry is on the bottom.

Planing

Notice how the plank is cupped.


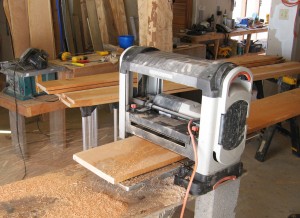
The next step is to plane all your lumber down to a uniform thickness. Most boards as wide as this tend to cup while drying because of the grain pattern. This cupping of the board is where your greatest planing thickness loss is. I usually set the Planer thickness to somewhere around 1-¼” to start. Run all your boards through at each planer thickness setting so that when you are done they all end up being the same thickness. Alternate sides with one full crank on the depth of cut gauge for each pass. I burned up a motor by forcing the material through the planer with too deep of a cut, which was a big hassle and cost me $175. So set the planer cutting thickness with consideration for what the noise of the motor is telling you. As you plane each side of the board one side tends to look more promising than the other, so after a few passes, pick a side and plane only that side till you reach your final thickness. Reduce your passes to ½ turns on the cutting depth, favoring the promising side. How much each board is cupped dictates how thick the plank ends up. I like my planks to end up at least ¾” thick and these ended up 13/16″.  Check each plank for thickness so they match.

Smooth plank with no good edges.

The most critical part of the process is to make planks with uniform, straight widths. A board can be warped or bowed slightly, but it can’t have a crook, (left to right bend). The edges must be straight and parallel. You can have a variety of widths, which I will talk about later.

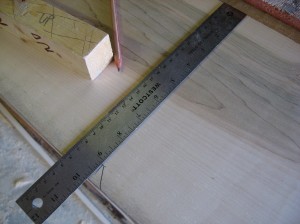
Find a reliable straight edge–I like using plywood, sometimes joining two pieces together to make it long enough. Pull a tight string to check it. My straight edge is seen here on the right.

Finding the widest usable edge.

In the past I used a circular saw and the straight plywood edge as a guide to rip along the widest usable part of the board. Later on I found some of the boards weren’t true because the blade of the circular saw would warp slightly from the grain as it cut, pulling the blade off angle slightly. This could create as much as a 1/8 inch variation in width. So then I bought a Dewalt, 15amp, 10 inch job site table saw. This gave me more power and higher saw blade RPM. The widest rip is 16” within the fence on this Dewalt. I make a 12” straight edge out of plywood and place it on top of the hardwood. Then I line up the plywood edge to within ½ inches of usable hardwood and using a screw gun, I slightly screw down the plywood to the board at each end. The plywood should then overhang the hardwood some and I place that overhand against the fence. I adjust the fence width to cut as close to the other plywood edge as possible without cutting into the plywood. It is hard to move big stock like this through a table saw and even more difficult with a big plywood straight edge screwed to it. I do this alone but would totally recommend a helper if you can find one. 
After ripping your first board, hold the straightedge up against it and check for straightness. It the edge veers off by more than 1/16” you should do it over. Sometimes you may need to cut a board in two because of difficult grain to make a straight edge. With stock this wide it can be hard to persuade a board into place with a slight crook, but the problem starts to compound–so be careful.

 
After you finish making your first straight edge cut on all your stock, evaluate each board for its widest potential. The widest potential is the narrowest point at which you cut the sin off in order to make a straight, parallel 2nd cut. With this batch, I chose 10 1/2″, 9 1/2″ and 8 1/4″. When fastening them down you just have to keep all the planks in a row the same width. If you have nice logs you can probably make all the widths the same. Although different widths make the job more complicated I like the variety in the finished look.


This second straight parallel cut is the most critical part in keeping all the boards uniform. But it is also the fastest and the easiest part of the whole project. Any variation will cause a gap when installing the plank and you need to decide how much of a gap you can live with. Consider the overall look of the floor when it’s installed–you can live with a certain amount of gap, you just need to decide how much.

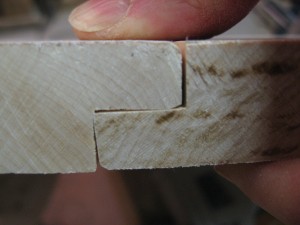
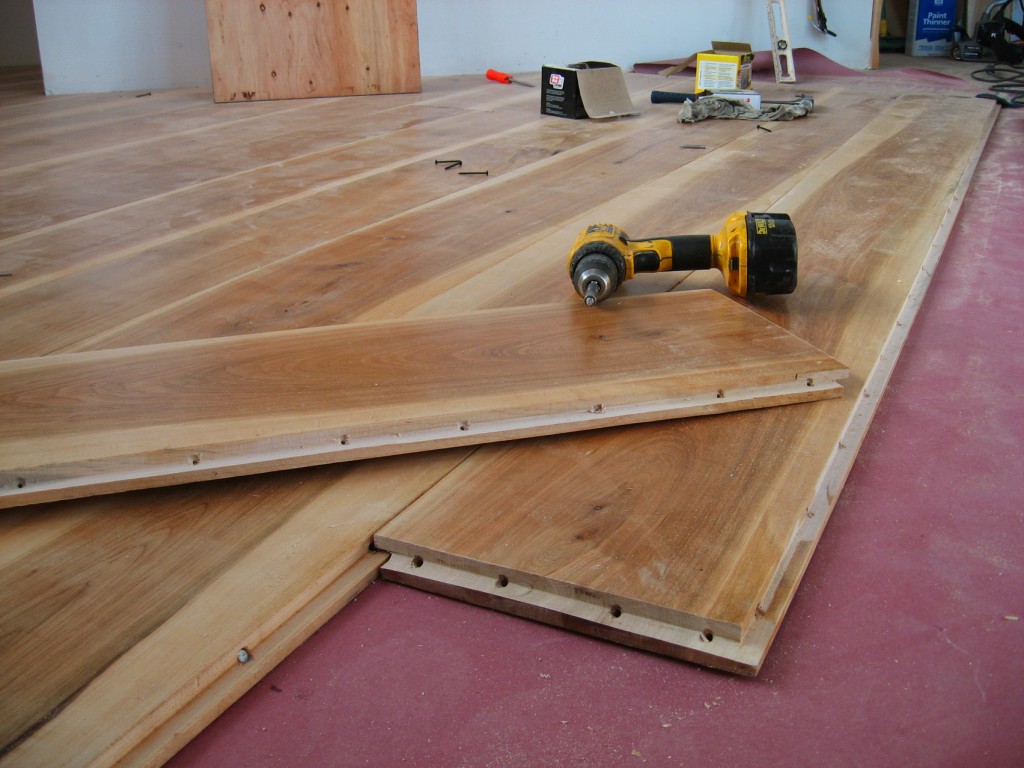
Tongue & Groove vs. Shiplap: Tongue & grove would be nice but it was too challenging and time consuming for me to handle with these big wide boards. I went with shiplap by using this trick; the bottom lap of the plank was nailed in normally form above. The underside of the floor below was exposed and so from below, I could use deck screws to pull down tight the top overlap edge. Unlike standard strip flooring, your main fastening method is from underneath. The headache of making these wide plank boards into T&G with my home shop router table was not worth it. I made some Ash, 3/4″ x 6″x 4′ boards into v-groove, T&G for a ceiling, but the router work was very difficult just with these smaller boards.  It would have been better with T&G but I think this method was a reliable alternative.  If you want to do tongue and groove- go for it.


Setting the fence.

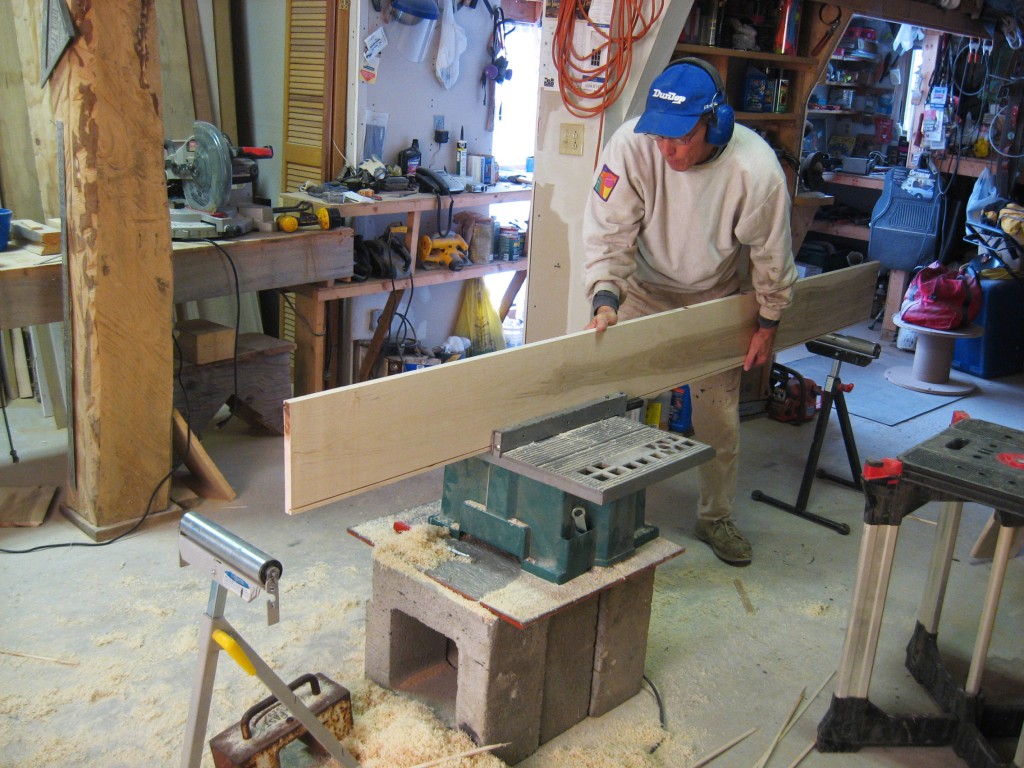
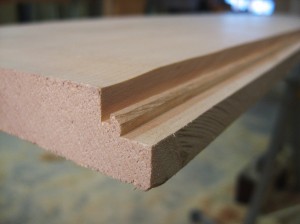
In making these planks into shiplap I used a three-step process. I pre-cut the boards with a table saw. The first cut is the face cut, which was just shy of 1/2 the plank thickness–in this case just shy of 3/8″ deep and ½” wide from the edge. Cut one side then flip the board and cut the other. This cut is not that critical because you are going to finish it off with a router.

The face cut.


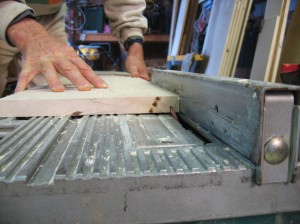
The second cut is harder because the board is on edge. It was just shy of ½” deep and 3/8” inches wide. Feeding the stock through consistently is more demanding than when doing the face cut and if you want to use a feather board it is recommended. Since you are making these two cuts smaller than the final size, they don’t have to be perfect.  Flip the board over and cut the other side. Don’t get your cuts mixed up; one lap is on top and the other the bottom!

Feeding the edge cut.

Peeling off the scrap.

Before the router work.

When you have completed these two cuts, just peel off the scrap. The scraps make excellent kindling.

The Router.


The router needs to be set to the exact final cut size, the depth of which is 3/8” deep and ½” wide. You can go less wide if you are worried about the lap breaking off, none of mine did. When you look at the grain pattern by the edge, sometimes you may wonder if in time it would break, but keep in mind this is hardwood. Go ahead…try and break it! The lap is also supported by the opposing lap underneath. I run the stock through twice to clean up the cut. This is quick because you have already removed the bulk of the material. You could skip the table saw pre-cut part if you want. After testing that idea, I went with the table saw 3-step process.

Router set-up.

Testing the fit.

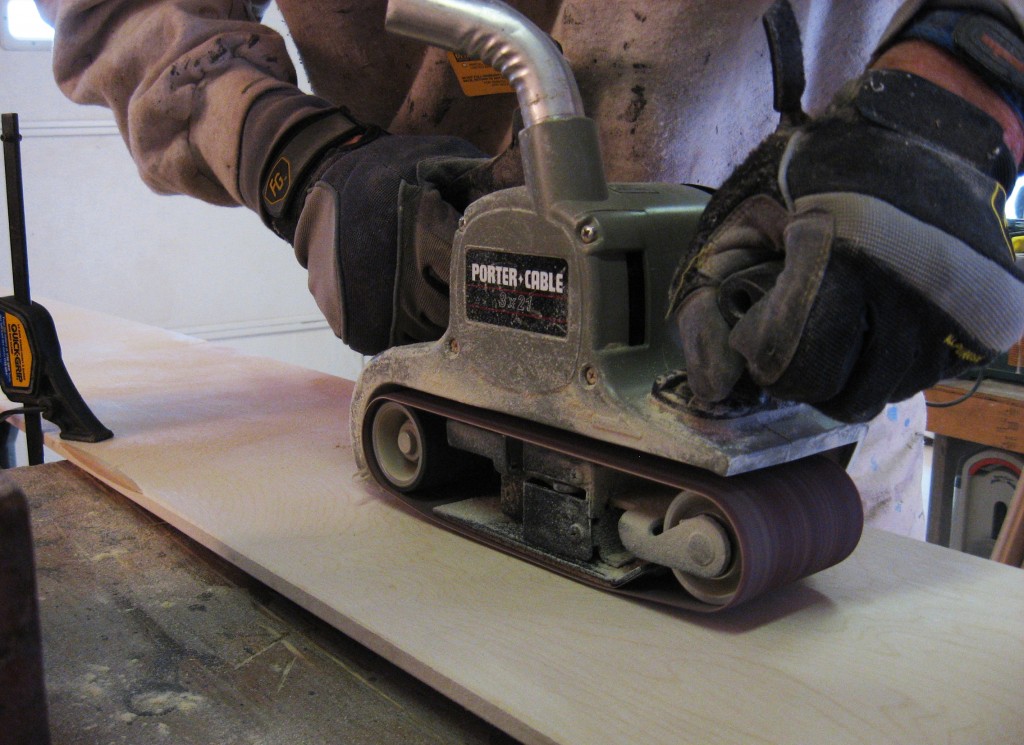
The Belt Sander

After the planks have been all milled, you need to polish them up.  But first a word about belt sanders: Be carefull!! They are more dangerous than they seem. Treat them just as cautiously as you would a circular saw. I have pinched a finger in between the belt and the guard and lost a nail, very painful. The power cord can easily get sucked up–along with gloves, rags or anything else. The belt sander pictured above had the annoying habit of self starting and jumping off the table, after that happened a few times, the drive axle bent and I had to get it rebuilt. Now it works great and I am very happy with this 21 x 3″ Porter Cable. If you don’t own one now, I would recommend a 24 x 4″ Porter Cable for this kind of work.

Beveling the edge: a dust mask is recommended.


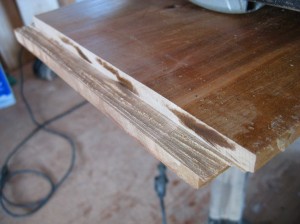
The planks are pretty smooth after planning, but there are, invariably, marks you want to smooth out. I use an 80 grit medium belt. I like a beveled edge and accomplish it by lightly running the sander down the edge.


After sanding, I varnish the backside, both edges and the top. The next day I used a medium grit paper with an orbit sander on the top surface. The varnish on the back helps to stabilize the plank from environmental impact, humidity or water spills. Now you are ready for the fun part.

Wide plank flooring installation.

The planks require lap joints at each end. I make them 1/2 inch wide and the same depth as the side laps–or 3/8”. You could use a router– but you are working with end grain and disaster could strike when a big edge chunk goes flying. I make a ½” template block and align it with the end of the board, marking a line along the other edge. For the bottom lap, I cut on the inside of the mark. For the top lap, I cut through the mark. Thereby the top is a hair longer and the bottom cut a hair shorter, which allows for any variation and a tight fit. I run my circular saw over the wood multiple times and then smooth off the cut with my belt sander.

Cutting the end lap.


End lap before sanding.


Pre-drilling the fastner points.

Since this is hardwood, I pre-drilled all fastener points so as not to risk splitting the wood. Use a small bit first to accommodate whatever size fastener you use, then a larger bit to countersink the head–being careful not to go too deep. At the end lap, I use screws so a larger bit is required there.


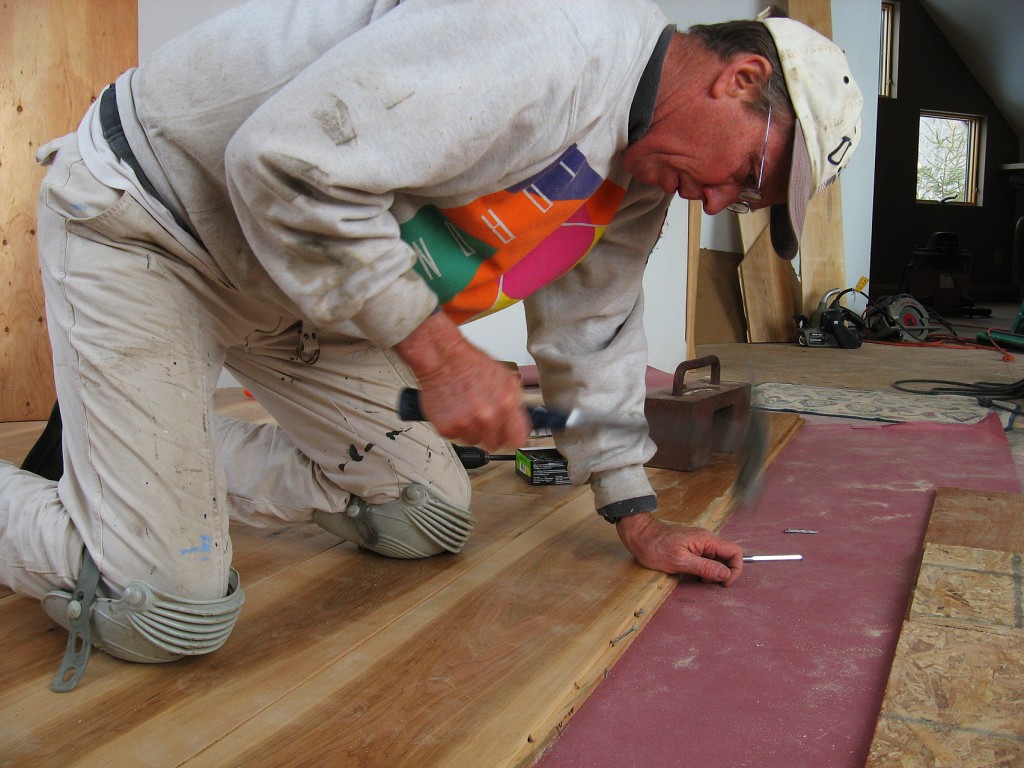
Driving the nails.

These are 2 1/2″ spiral shank, galvanized deck nails, with about a 4″ nail pattern.  In the above photo, notice the finish nail in the foreground of the nail I am driving. This is a 2″ finish nail I use as a guide to find the edge of the next overlapping board when I go downstairs and screw it in from below.  Knowing where this edge is critical since the boards are not tongue and groove. I sink this nail flush and leave it.

Countersink the nails.

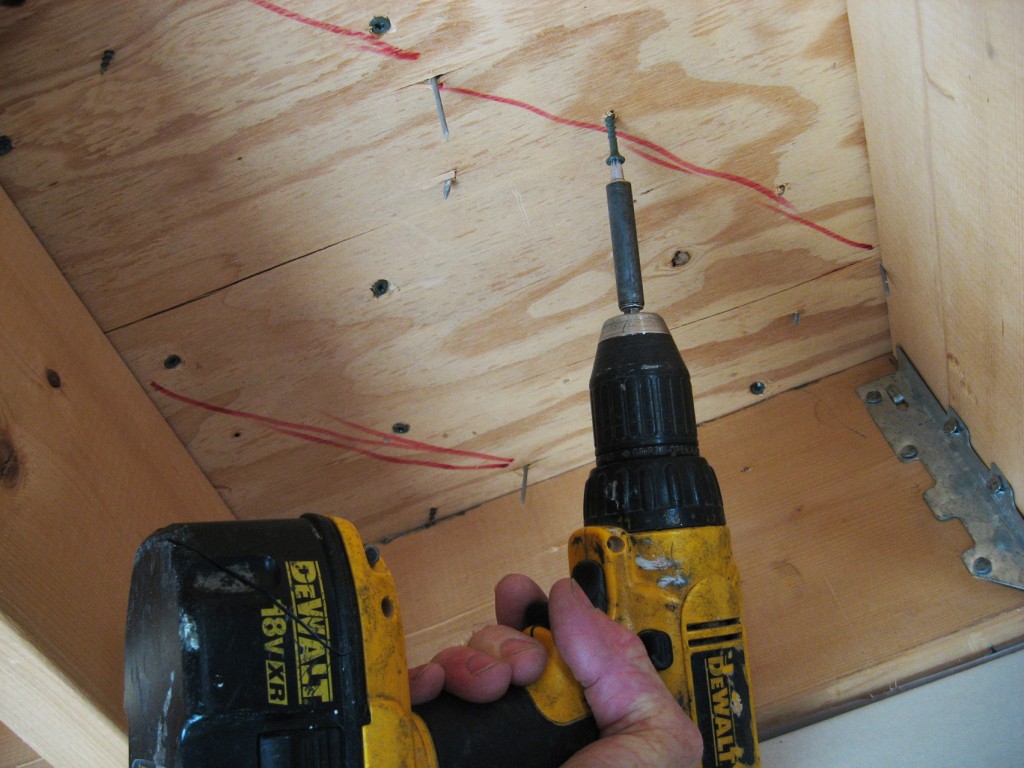
Predrill the screw holes.

Pre-drill the underneath screw holes to avoid splitting. I don’t know for sure what would happen if you didn’t pre-drill the holes–but I don’t want to find out five years from now. My screws are 1- 5/8″ exterior deck screws for extra strength. You need to fasten these at an angle for two reasons: one–they are too long for the 3/4″ plywood sub floor and the 13/16″ plank; and two–the angle gives them more holding power.

This is an edge screw and you want to set these at an angle that will pull the board down tight on top of the bottom lap and towards the adjacent plank. You need to find your locater finish nail and mark a line along these points between the floor joists. Observe the spiral-shanked flooring nails penetrating the sub-floor–these also help guide you.

 If the plank is bowed, I take two of my 55 lb. elevator weights and set them on the bowed edge, of course do this before you set your underneath screws. It would really be nice to have a helper up top–standing on the edge and giving you feedback. Most spouses don’t consider this quality time spent together, so I have to use the weights. The center screws are set at random angles.  Fastening from below is what makes this type of installation of wide plank flooring possible– so do an excellent job here.

Sanding any ridges.

When you are done, there may be some edges or joints you want to sand. If you didn’t pre-varnish, you may want to rent a commercial floor sander and go over the whole thing. If not, you can take your belt sander and hit the objectionable spots. If I had to do this job again from what I know now, I would of rented a floor sander and gone over the whole floor. I will finish this floor with a total of 3 coats, (including the one already applied),  letting varnish flow liberally into any gaps.

Finished wide plank floor.

To date there have been no signs of cupping or distress. This is an unheated living space when I’m away, so it goes through quick and wide temperature changes when I fire up the wood burning Hot Blast furnace. It never gets that humid here for long periods in the summer and I don’t use air conditioning. I will be taking humidity readings over time and record the variation. The problem with wide plank flooring is cupping and fastening. I think I have found a good solution to hidden fastening but don’t know yet about the cupping. If it does happen, I don’t think it will ever be severe enough to require replacement–unless there is somehow extended water damage. We had water damage in our NYC apartment from a neighbor’s flooding. The water saturated many of the 3/4″ oak parquet tiles in our bedroom and they warped noticeably. I waited for the winter heating to drive out the moisture and by the time I got around to sanding and refinishing them again, the tiles were mostly back to looking normal. They needed refinishing anyway and now they are fine.

Finished Wide Plank Floor composite photo.

I hope you have enjoyed reading about making and installing Wide Plank Flooring.