Of course while working on the entryway I was formulating my plan for the kitchen. I knew where the sink, counter, refrigerator, and island stove were going but what the heck was I going to do with the ceiling? The old workshop ceiling was 10’ tall. The living room on the west side of the kitchen had an 8’ ceiling and the dinning area on the east side had an 8’5” ceiling that sloped down to 7’. I hated to just lower the high kitchen ceiling down to 8’ 5”. I wanted a tin ceiling in the kitchen but not throughout. I knew from installing the tin ceiling on the 2nd floor that it was not easy. When working with tin ceiling panels, the larger the area the harder it is to keep the lines straight. I don’t care how many lines you snap- especially when working alone and not being an expert, the tin panels will want to wonder. The answer was a large soffit surround that would blend all the ceilings together and leave a nice 10’ high rectangle in the center for the tin ceiling. The soffits have an added benefit in that they are a great way to run wiring and recessed lighting. A lot of work? Hell yeah! But what the heck- nothing has been easy so far.
When using new lumber straight from the yard you need to be concerned about the woods moisture content. I did not want to spakel and sand before the wood had acclimated to the surroundings, otherwise you can get cracks in the sheetrock joints later as the wood shrinks and dries. Winter is a good time to let this happen and I got the 2×4’s down to 9 or less on a moisture meter scale. Buying wood from a place that stores lumber indoors is a good idea if you are in a hurry.
This photo below shows my method of installing 5/8″ fire code sheet rock solo. These are called grip stands and are used in film & TV production for lighting. You raise one side a little and then go over and raise the other side, back and forth till it reaches the ceiling joists. I have never lost a piece of sheet rock since I started using this method.

Installing 5/8″ sheet rock on the 10′ ceiling solo. Dinning area in background.This room had been my workshop for over 12 years. Reorganizing all the accumulated stuff was overwhelming at first but I just slowly chipped away at it and it was not so bad. The wood furnace in the dinning area will be replaced with a small glass door wood stove.

This is a 6″ Tjernlund in-line fan to move hot air from above the woodstove into other rooms. The intake will be on the left photo.
Having these large soffits allowed me to install a warm-air handling fan and duct-work. The filtered intake side is directly over the wood stove and it will move this air into the living room or bedroom or both. The fan control is wall mounted, 4 speed and you can not hear it at all on low. High is noisy at the intake side.

Two types of Halo, 4 ” recessed light units. Remodel on the left and New Construction on right. They cost about the same and these take an incandescent bulb. The spring clips on the left can be a challenge to install and are not to be taken lightly.
Lighting is a big deal in the kitchen for any home and recessed lighting is the way to go. This is a photo of two options; the remodel version on the left can be added to an existing ceiling but could be changed in the future and the new construction one on the right that could not be swapped out without ripping up the ceiling. I put this remodel version directly over the sink in case I wanted to change it for some reason. Why would you want to change it? There is a revolution going on with lighting now and LED is the rage. These units are for tungsten bulbs but both can be retrofitted with LED lights. In the past the color of LED lights was a problem but not anymore. Check the box. I wasn’t sure which way I wanted to go so I went with these so I could go either way. I am big on using dimmers and LED’s do not change color temperature when they are dimmed unlike tungsten bulbs which become warmer in color as they are dimmed down. The Cree brand of LED lights I bought from Home Depot and retrofitted for some of these kitchen lights have a slight buzz when they are dimmed way down low. The kind of buzz you would only notice when it is quite. If you are cooking or talking etc. you wouldn’t notice but it could be a problem in a bedroom or someplace you wanted to read or sleep.
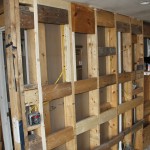
I went with a 2×6″ sink wall to allow for the plumbing. Especially the 1.5″ vent pipe for the kitchen sink and bathroom shower behind the wall. I put bridging in between the studs where the counter and cabinets will be attached to make it beefy and give me fastener location options.
To say I was totally confident about my kitchen ceiling design would not be correct. I thought maybe the soffits were too big and would overwhelm the look. What I am happy about at this point is the way the ceilings from the adjoining rooms flow into the kitchen. One is 8′ and the other is 8’5″. The soffits do create strong visual lines for a unifying design.

Now the Kitchen is starting to like like something. Not sure if I am happy with the look yet but I am feeling better.
Tin ceiling tiles come in few different installation types. Nail-up is the traditional way but it requires furring strips underneath. I used nail-up tin tiles upstairs with the backing 12″ on center. Since then I discovered a new type called Snap LockTM. This style is available at www.americantinceilings.com in Florida. I recommend this company.
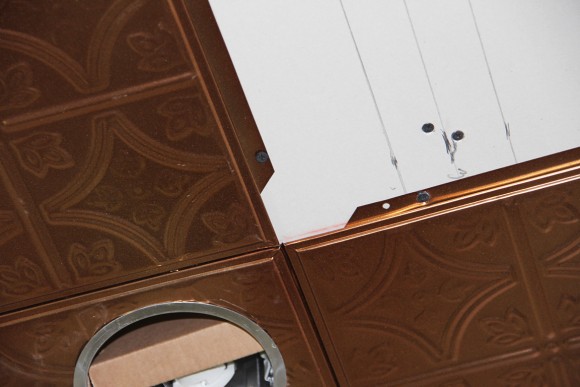
Snap LockTM tin ceiling tiles have an interlocking flange system that allow the tiles to snap together. The beauty of this system is that no furring strips are needed and they screw directly into dry wall so you can install them into an existing ceiling with no modification. The style I purchase were 2’x2′ finished in Copper Penny. 100 sq.’ for less than $500 delivered.
Snap LockTM tiles are the best style to install alone.
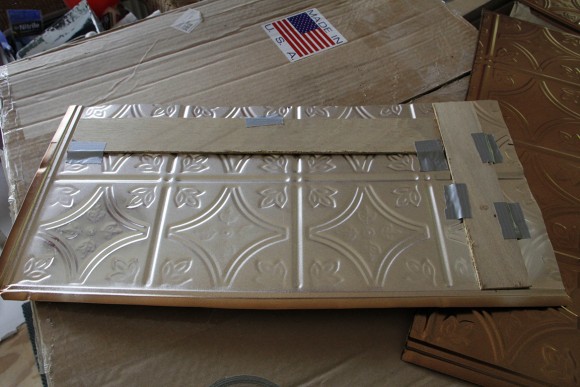
Because of the interlocking system the tiles are thicker around two sides. When you trim a tile a filler is used to maintain the correct depth all around. This also helps when I put up my crown moulding.
It is very tricky to maintain a consistent gap and follow the snap line. The folks at American Tin Ceilings told me the gap is important or you will screw yourself eventually. They also said not to get carried away trying to get your recessed lighting to line up with the squares in the tiles. They were right. I think it is a good idea to ignore the manufactured hole and screw directly into a joist occasionally. I’ll put in a photo of the finished job when the crown moulding is up.
My experience with ordering kitchen cabinets from Home Depot was kind of mixed. I went into the local store right after the new year with my drawing and cabinet schedule layout just to get a ballpark idea of what the cost would be. I knew for sure I wanted custom KraftMaid full plywood construction cabinets. I knew the color and style. The salesperson was a little put off because she wanted to help me design my kitchen. It was a good size order and I am sure Julie would of enjoyed helping me but I had already been there and done that with my city apartment kitchen renovation. The Home Depot designer back then was a big help and I learned a lot from that experience. The problem started when Julie told me KaftMaid was having a big sale that ended in 3 days. The sale amounted to over $1000 in savings. I felt good about my design but had planed on looking at the prices and mull over some different options. No time to tweak- I had to place the order. The thing was I didn’t need the cabinets for three months at the earliest.
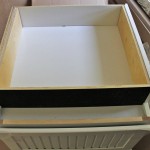
All plywood construction is worth it if you can spare the cash. View of a base cabinet flipped upside down. Cheaper cabinets would all be made of OSB instead of plywood. These cabinets are much sturdier and heavier than OSB but once in place who cares? It is up to you. $1000 extra for 10 cabinets all plywood construction.
As time went by I realized I had made a mistake about the pantry wall and base cabinets- they weren’t big enough. I knew it wasn’t going to be easy to change the order but after about a month I went into Home Depot and talked to my sales rep and see if I could get her to make the change. Julie figured out the cost of my changes and it negated the discount I had received. She did not have the authority to change the discount codes. Unlike helping to design kitchens- this was a major pain in the butt to her I am sure. Julie went and got the store manager. I explained to the manager that KrafMaid had called me to confirm the order and said they wouldn’t start to make my cabinets till March. It was the beginning of February so he called them up and explained the situation. They all agreed the change would be OK and I blew a big sigh of relief! I had been there for over two hours and finally the manager looked at me and said, “This is going to take some time and you should come back.” Discount codes are not to be taken lightly. Sorry.
The kitchen construction schedule plan was to get the sheetrock up, sanded and primed, followed by putting up the tin ceiling, finalize the sink wall plumbing and then start with the cabinets. First I needed to fix the floor where the sink wall base cabinets and also the stove island cabinets were to sit. These were actually 4″ deep rectangular holes left from the radiant floor heat install and thinslab pour. You do not want to heat these areas.

Freshly puored cement for stove island location. Electric and gas lines are visible . Perimeter has PT 2x on edge for attaching cabinets to floor.
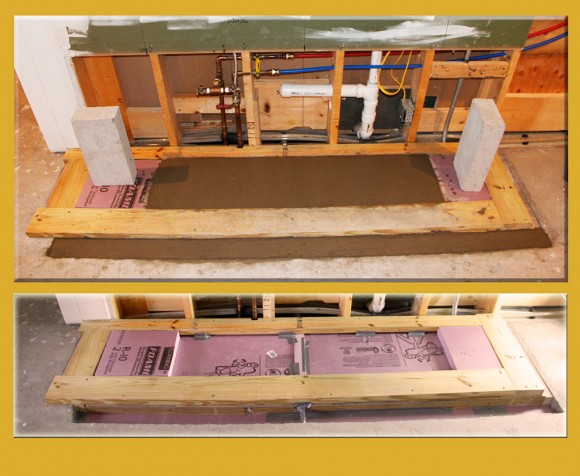
The sink wall base raised 1.5 inches for the tall guy who washes the dishes. If you read the book on installing kitchen cabinets they talk about this option. Stove countertop needs to be standard height of 36″ but not the sink countertop. This will be 37.5″. Deb doesn’t mind and it makes a big difference to me.
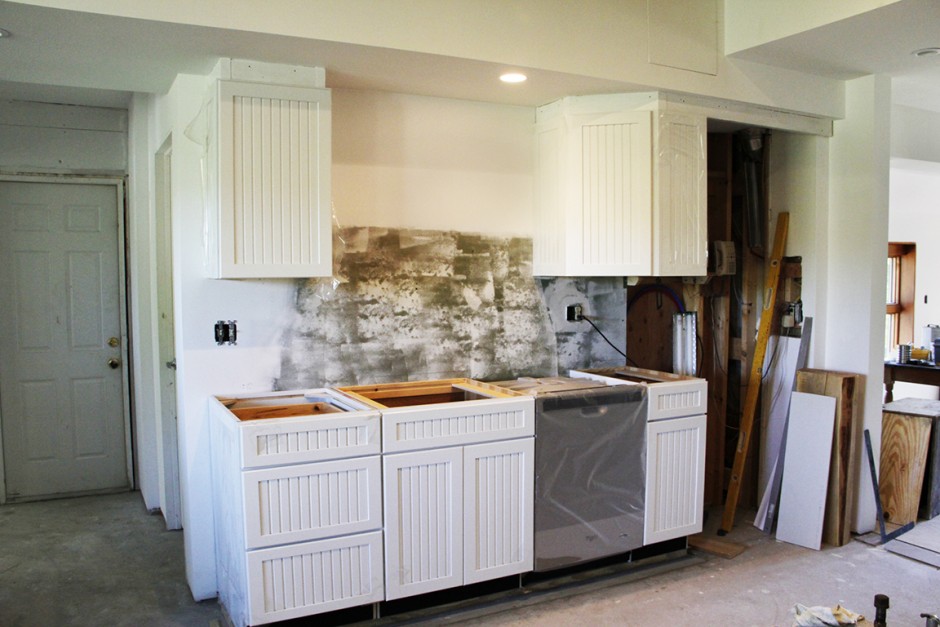
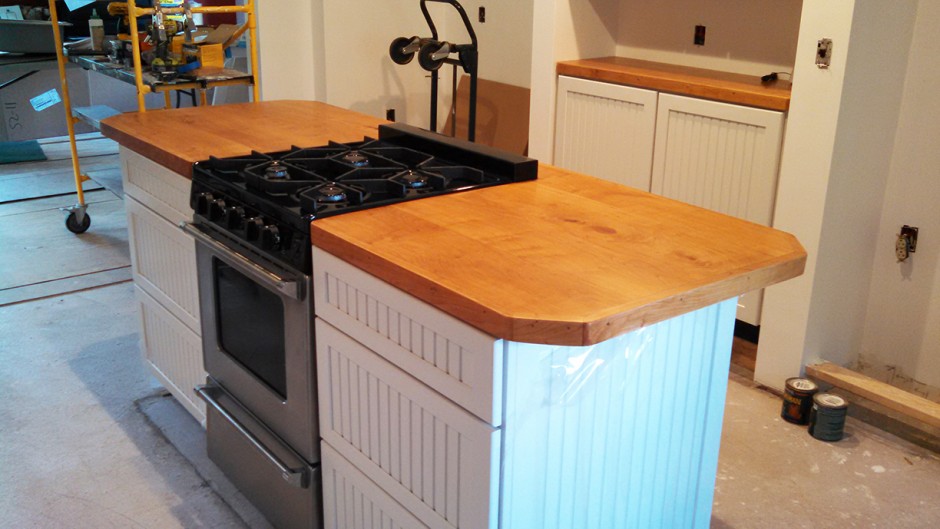
 After the cabinets were put in it was time for the counter tops. I had seen a photo in the friday edition to The WallStreet Journal of a white kitchen with dark, hardwood countertops. That was my inspiration for this kitchen and I had just the hardwood for it. In June of 2012 a large bolt of lighting struck what must have been a 150 year old cherry tree outback. The lighting had blown out a large strip of wood from top to bottom. I found chunks over 200′ away. The tree was killed dead and with it all the ground cover from the leaf drip line to the trunk. This was not the kind of tree that a logger would ordinarily use for lumber because the tree trunk branched off too quickly. I couldn’t see letting it go to waste, so I cut it down in the fall and had it sawed up into lumber. Sure enough it wasn’t the best stuff, too many knots and checks but I was able to find some usable stuff. I named this hardwood- “Lighting Strike Cherry”
 These are 1×8″ cherry planks. Ordinarily hardwood countertops are 1.5 or 2″ thick, narrow strips glued together but I am not set up for woodworking and this seemed like the way I could pull it off. The plan was to glue and screw these 1″ planks to 3/4″ plywood, giving me a finished thickness of 1 3/4″. Then gluing and nailing a 2″ face surround. Both the cherry and plywood were down to a moisture content of 6. The problem for me with using narrow strips of hardwood was the sanding. I just have a 3×21″ belt sander and didn’t think I could sand it all down as smoothly as I would using this method. Also the nightmare of working alone and trying to line everything up during the gluing and clamping. This was hard enough as it was and I think I got lucky.
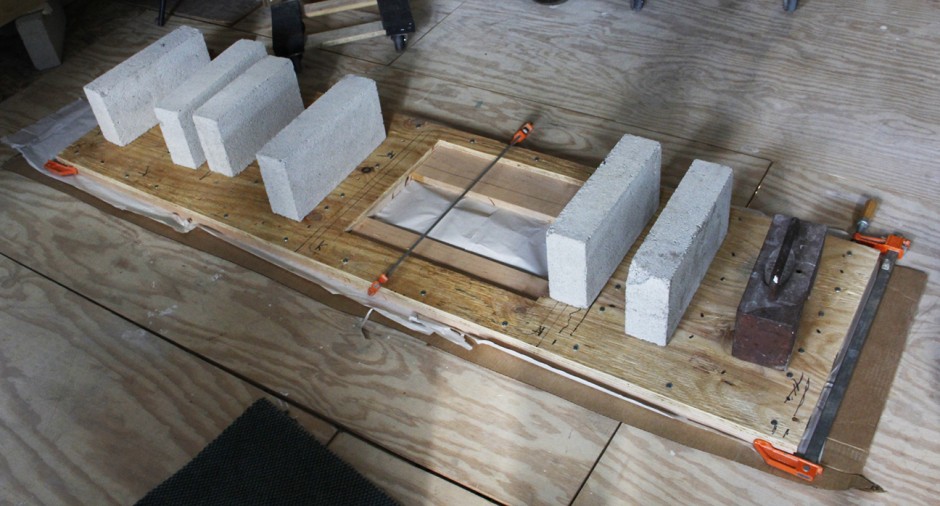
I am not sure if I needed to screw this together but I did, drilling pilot holes very carefully so the screws do not split the hardwood. Out of all these screws only the tip of one came through which sanded down to being unnoticeable. The weight is added to help prevent any warping. Kraft paper underneath stopped the counter top from sticking to the cardboard and could be easily sanded off.
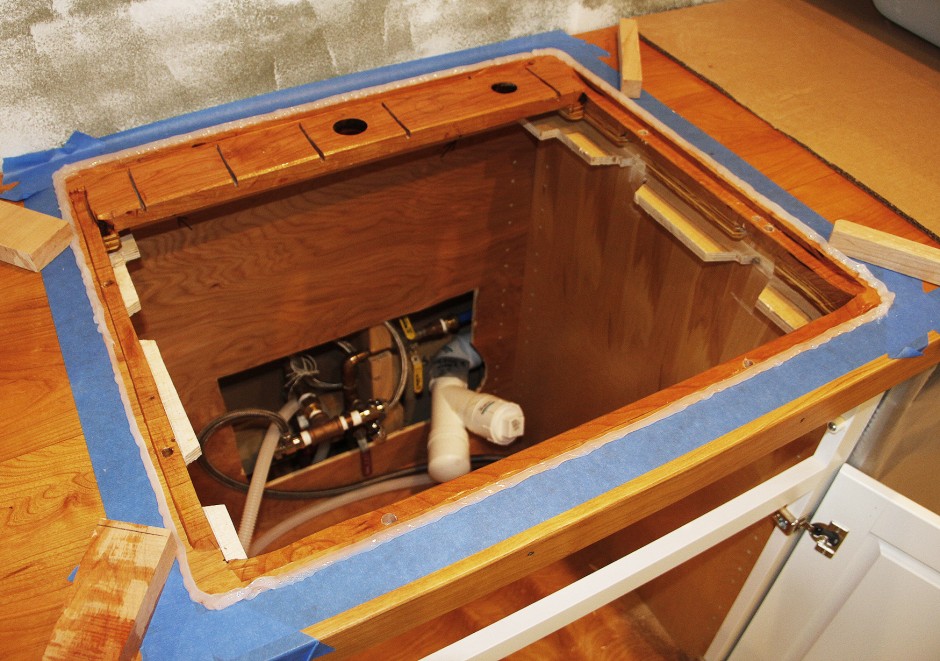
To say installing this sink was easy would not be correct. The problem was the manufacture- Elkay and I had two different ideas about how it should be done. In the end we met in the middle. Elkay wanted a sink cut-out that was 3/8th inches smaller than the outer edge of the sink. That would of been much easier but structurally I hated the idea.
You can see by looking at this sink cut out that there was a lot of screwing around. I do not want to go into all the details except to say that the problem came in regard to the clamps. Note the 1/2 inch holes drilled around the perimeter of the sink cut-out. The clamps are attached to a slot on the underside of the sink and they can move in the slot. Nightmare to line this up by myself with the silicone chalk. There was a lot of cleaning up to do but in the end it turned out good.

4 coats of diluted Epifanes high gloss varnish and a final 2 coats of Epifanes rubbed effect varnish were used to finish the counter tops.
The huge consideration about wood countertops is water contact issues. There are different opinions on how to finish wood for counters but no one that I have come across disavows the use of wood. I went with Epifanes marine varnish from Jamestown Distributors based in Bristol, RI. It is also stocked in local marine supply shops. The product costs over $40 per quart or 1000ml. This is the sort of varnish used on the deck and hull of a wooden boat, so constant water contact is a given. Scratches do not concern me and dings and dents over time will only add character. An occasional reapplication of varnish over the years is a given.
By this point it was the end of June and I was way past my schedule to start the new downstairs bedroom. My left hip had become a constant source of pain throughout the winter and spring. Limping around had become the new normal and my right hip was letting me know it was compromised also. I had gone to see a hip surgeon in February. I told him I wanted to try and build a bedroom addition before I had a hip replacement. Dr. Ranawat looked at me skeptically and said, “You are going to need a hip replacement and you can do it now or you can do it later but you will have to get it done.” I did not doubt his assessment. My reason for delaying were two fold; I needed to make more money and I felt like this new bedroom was critical to the value of our property. If anything went seriously south during or because of the operation at least the bedroom would be a reality. The thought of digging a foundation, climbing in and out of the hole along with climbing up and down from the backhoe made me cringe. Then the thought of climbing around on a pitched roof in cold weather made me cry. So my plan was to just take it one step at a time and stop if I had to.

