It was the beginning of July and I was anxious to get started on the bedroom addition. The only thing stopping me was an obnoxious 7x16x8′ storage shed and kiln attached to the side of my house where the bedroom was supposed to go. 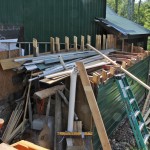 It served me well over the years but it was built for when the building was used as a workshop/garage. I had taken all the hardwood “Lightning Strike Cherry” out of the kiln in May but there was a lot of other lumber and crap left to deal with. You know the kind of building stuff you can’t throw out because you may need it some day? I was in denial about the problem of finding a good place to store all of it, not to mention the additional lumber from dismantling the shed itself. Like maybe I could just neatly pile it all up and cover it with a tarp? It didn’t take long to realize that idea was half-assed, the tarps would blow apart eventually and anytime I wanted to get something from the storage pile it would be like major surgery. Building another lumber storage shed was the only way to go.
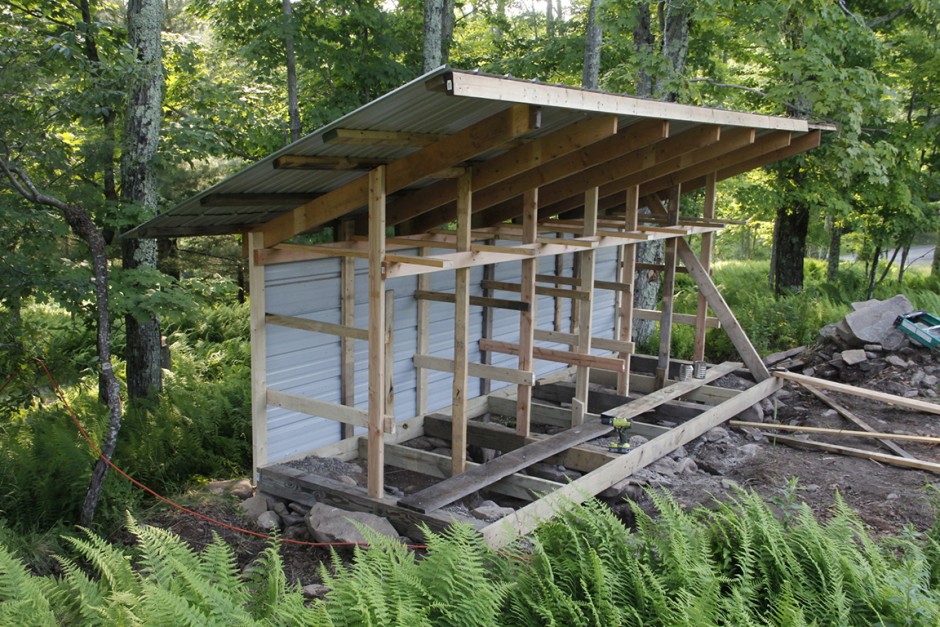
So first things first and I built a new storage shed, keeping it simple going with an open-air design. That only took a couple days and then I started to remove the old shed. Fortunately for me it was mostly put together with screws so it came apart fairly easy and I was able to salvage almost all of the material including the screws. All this took a couple weeks in between camerawork jobs. By the last week in July I was ready to dig the foundation for the new bedroom.
About the same time I got a call from a clients asking me to do a 10 day job shooting in Hawaii for mid-August. Now that was a impossible opportunity to turn down. I am not a big fan of travel jobs at this point in my career but Hawaii? So I accepted the job and started to rethink my bedroom addition timeline. I was flying out on August 4th and returning on the 14th. If I could at least get the foundation pour done before I left for Hawaii- that would allow me to enjoy myself while working there and make me feel less stressed when I got back.

Starting the bedroom addition excavation. “The Max” allows me to truck away the spoils and keep the job site clear. The back-fill after the concrete pour will be sand and gravel.
It is always a little unnerving when you start to excavate because there is no turning back- unless you are a quitter. Quitting was not an option bad hips or not. On Saturday, July 25th I began the excavation and worked straight through till the foundation pour on the following Saturday, August 1st. At first I thought I could get it done in time but then on Tuesday the rains hit hard. Not all day rains but hard soaking thunderstorms that would cause big water runoffs. The secret to working in a trench is to have your drainage pipe set in the bottom and covered with clean stone. That is the first thing you should do, so when water does runs down into the trench it has somewhere to go and not fill up the hole like a bathtub. On the first leg of the foundation I tied into the existing living room foundation line that drained to daylight. Because of my sloping property, all my foundations drain to daylight, if possible it is always the way to go.

Bedroom addition foundation drain. Running water through too confirm that it’s clear after a soaking rain. Drain is lower than the footer.

Interior form wall. The lower metal will not be removed after the pour. Note the tarps around the trench walls to prevent muddy water from flowing into the hole during rain storms.
Another trick I use is to take old tarps and drape the walls of the trench so when the rain hits it doesn’t make so much mud. Mud is a battle that sucks you in, slows you down and saps your energy. You must prevent the mud from mixing with your clean stone as it compromises the perforated pipes’ ability to drain. So when your hustling and hurting, to watch the deluge hit is pretty sobering. You better be prepared. The rain knocked me back a bit.  I was building the forms as I went and moved that process inside the garage to work during rain events. I made some calls and put a guy on standby to help me with the cement pour- if and when it happens because I still didn’t know if I could get it done before the Hawaii job. When I called my normal concrete delivery company to put them on hold, I found out they went out of business. The next two companies I called said the house was too far away. I pleaded with one lady and she said, “You won’t be able to work with the concrete by the time it gets to you.” Starting to feel sick I wracked my brain. I remembered seeing another company’s trucks around from the past and then visualized the name, they were not in the yellow pages but buried in the white pages. Great- they could do the Saturday delivery. Whew- now get the forms in.
A critical part too any building addition is ensuring that it is square to the existing one. With modern calculators it’s no big deal to find the hypotenuses of a right triangle and check for square. What is a big deal is actually holding onto two tape measures, alone, while standing in a hole and trying to position a form. You only need to be concerned about one leg at time but the thing that kept screwing me up was that the inside room dimension was a even 12×16′. The walls were going to be 8″ thick for an outside dimension of 152″x 208″. So for example the long wall leg, depending on what point I was measuring could be 192, 200 or 208″. The short wall could be 144 or 208″. The hypotenuse would change accordingly. The point is I was juggling a lot of balls in the air, watching the sky and trying to pour cement by Saturday. Your mind is going a lot of different places. I was putting the last outside corner form in place when something didn’t look right. WTF? Come to find out the 16′ inside corner form was too long. To make matters worse, I had it all secured in place. The only thing that saved me was I hadn’t back-filled the inside form. Fortunately there was enough room inside the trench to smack back the short leg then cut down the long form to the correct size and keep it all level. One hour later I was back on track but oohh-wee some crazy alternatives had sailed threw my head and then fortunately kept on going.
The concrete was poured on Saturday and I ended up with a very well drained, insulated, substantial foundation. I couldn’t be happier.
I just quickly want to discuss the version 2.0, John Davis, method of pouring a frost wall foundation. The inside form is permanent. It is constructed out of two layers of excess or used metal roofing. One layer is vertical ribs screwed to a second layer of horizontal ribs, which gives it strength to support the forces of gravel back fill. Each length of metal panels are screwed to a 2×12″ top plate. The wood top plate is perfect for lining up and leveling everything into place. The outside form is a double -sided, plywood, 2″ x 4″ wide panel with 2″ rigid foam insulation attached to the inside of it. Big rock goobers are placed in the bottom of the trench. 5/8″ holes are hammer drilled into the goobers and 1/2″ vertical steel rebar is pounded into the holes. Horizontal lengths of rebar is then attached to the vertical rebar. The bottom of the trench v’s out and is held apart by the big rocks. That becomes the footer. The outside form wall is back-filled with sand and the inside wall is filled with gravel. The outside wall is held in place at the top by wood spacers. Braces are placed on the inside top 2×12″ to stop the forms from moving during the pour. The concrete is vibrated down at the bottom of the trench when the cement is poured filling all the voids.
After the pour- the next day- the outside form sand is partially excavated and a chain is strategically attached to the form. The form is gently pulled out and away by the backhoe, leaving the 2″ rigid foam insulation pressed against the concrete foundation wall. Nails were put through the rigid foam and let set into the concrete, preventing the foam from pulling out with the wooden form. The forms are held in place by the backfill. The backfill is not compacted allowing the forms to V out at the bottom somewhat from the pressure of the wet cement during the pour, creating a nice big footer. Voila! Why do I do it this way? I hate bracing forms and I don’t have to worry about any of them blowing out or moving during the pour. I have seen it happen.
Next stop Hawaii!!
It was August 15th and the next order of business was to insulate the radiant slab and its’ perimeter, install the rebar, run the PEX tubbing, then pour the 6″ slab. Two years earlier, before I poured the dinning room slab, I ran some 3/4 inch tubing that went from the radiant floor heat manifold, under the slab to what was then the outside of the building, or about 14′ to where the new bedroom would eventually be.
These guide tubes were well insulated and just big enough to let me push through the 1/2″ PEX tubing. It actually worked as planned and I was able to do this.
Insulating the radiant heat slab was critical and I went a little overboard. Here is what I did; the first layer was a product called Insul-Tarp® which is supposed to be a miracle insulating, vapor barrier for cement slabs. It is controversial in regard to it’s insulating properties but it is not too expensive and I believed it to be an excellent vapor barrier. What ever insulating properties it could have- all the better. I had some used 1″ rigid foam insulation salvaged from the old wood kiln and used one layer of that over the Insul-Tarp®. The final layer was shiplapped 2″ rigid foam, for an approximate R-value of 15 to 19, depending on how you rate the Insul-tarp.
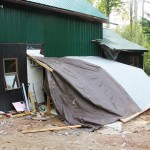 While doing this I had nice dry weather but lots of rain was in the forecast. Because of all the insulating layers used I was worried about water getting trapped above the vapor barrier and even floating my rigid foam around. So as much as I hated to do it, I covered the area with tarps. All the rebar and PEX tubing was installed under these tarps. This pain in the butt, trapped water issue was to follow me till the bedroom roof was covered. Trapped water under a radiant floor slab can cause heat to suck away- so to speak- don’t want that.
The next consideration was the rebar. As a rule, rebar should be closer to the surface of the cement than the bottom for crack prevention but my main concern was to use the rebar as a fixture for my PEX tubing. I had read the previous winter in an article found on the web that the Pex tubing should lay closer to the bottom of a 6″ slab. With this in the back of my mind I installed the steel rebar 2″ above the bottom at 16″ centers. Then I connected wire mesh on top of that, which allowed me to place my PEX on 8″ centers. The 8″ spacing was called for in my heat loss study and is pretty standard for homes. The problem was I started to second guess myself and went back to Siegenthaler’s hydronic heat bible just to double check. I got the cart before the horse on this one. Unlike the article I read on the Web, Siegenthaler’s book recommends the tubing should go closer to the top for a faster response time. Well, raising the steel, after the fact was not easy to do, especially alone. First of all, the rebar ends were inserted into holes drilled into the walls and the wire mesh won’t let you put your foot down for proper leverage- not fun. In the end, I was able to get most of the PEX two inches from the top but it was not easy.
The next step was to run the 1/2″ O2 Barrier HeatLink® UV Stabilized PEX-a Tubing. I needed to run two individual floor loops and I wanted a wall radiator for quick heat response time for when I came back from being away from the place. There are different ways to run the floor loops but my idea in this case was to run the loops starting from the outside walls where hotter water would be needed and work my way into the center where the bed would be located and therefor less demand for heat.
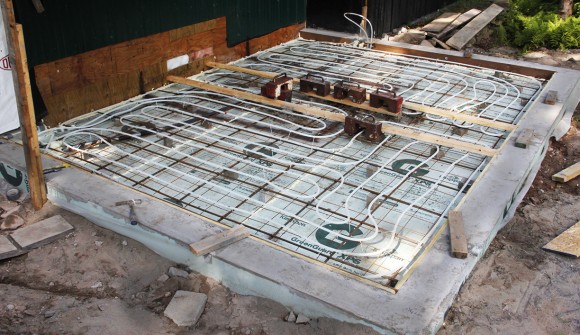
1/2″ O2 Barrier HeatLink® UV Stabilized PEX-a Tubing. Note the 50 lbs. old elevator weights in the center to keep down pressure on the layers of insulation. These weights are removed as the cement is poured in the center.
Finally I had to install some leveling guide boards in the center to break up the pour into two, 7′ sections with a final go back and fill 2′ center. It worked according to plan with my 2 local hire helpers. In fact, it was the smoothest finish pours I ever did.
All this was done in time for Labor-day weekend!
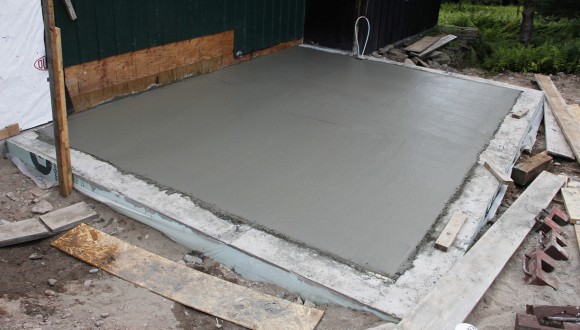
I poured the radiant slab floor in the bedroom addition on the Friday before Labor Day weekend. The cement truck pulled out by 1 p.m. and I paid and released my crew. As I was floating the concrete, I heard the lumber delivery truck roaring up the mountain. I rushed down the driveway to greet him and discussed how to unload the truck. It was a full size tractor-trailer with a Moffett forklift hanging off the back. He was 2 hours early but better late than never or something like that. The driver probably didn’t want any delays screwing up his holiday weekend either. I rushed back to finish my cement float finish job while he unloaded the truck. By the end of the day, I got so far as too attach the pressure-treated sill plates to the foundation. It was a great day.
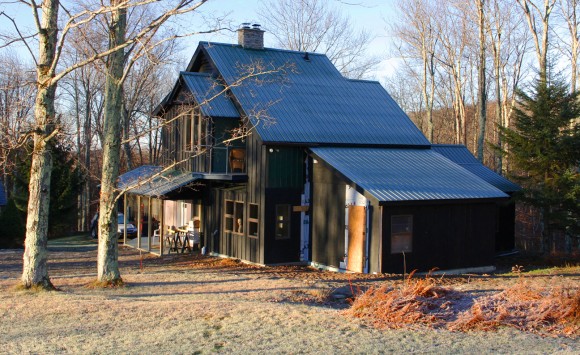
I haven’t mentioned the design of the new bedroom and how it was meant to integrate with the house, so here it is: All the buildings that make up my “town” have either a 5/12 or a 10/12 roof pitch or a combination of both. Meaning the roof slops down 5” over 12” horizontal inches and the steeper pitch of 10” sloping over 12” horizontal. So those were my choices. You do not want to introduce a new roof pitch for something like this, as it will look wrong. The roof above where I was attaching the bedroom had a 10/12 pitch and I considered connecting to that and just continuing the slope out. The other option was to break the slope to 5/12. My drawings of the two options convinced me that breaking the 10/12 to the 5/12 pitch was the way to go. That way my outside bedroom wall could remain a full 8 feet high. As I look at it finished now, I am glad I made that decision.
When I had my epiphany three years ago and visualized the new compound, I chose to go with 2×8” walls for all new construction as opposed to the old 2×6” walls. That way, I could use a snug fit R30 insulation in the walls. With the amount of windows I was putting into the design, I could use the extra R-value. The other consideration for the new bedroom was to keep the windows low enough to see what was going on outside. There is nothing like lying in bed and looking out the window to watch the wildlife nosh away on the landscape (unless it is deer eating your shrubs).
I planned rows of recessed lighting on all four walls, with two independently controlled reading lights for each side of the bed.
Since this was my last hurrah for the new big house, I decided to go with a hardwood beam treatment for the ceiling. That would involve two 8×8” beams going down the ceiling and parallel to where the edges of the king bed would be. Then there would be two perpendicular rows of 4×4” beams going the other direction creating a hatch work look, with a ceiling fan in the middle. The upstairs bedroom has 8×8” maple beams, so this idea would integrate the house.
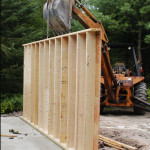
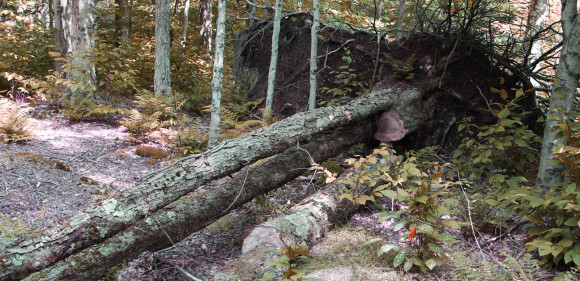
I had my first wall up by the end of Labor Day weekend, so things were going good with my plan to have an enclosed bedroom before the snow flies. You always have to plan ahead and I was thinking about those beams and how I was going to get them up. The 4×4” beams were not a problem but the 8×8” beams were something to consider since I was working alone. I figured if I had them ready to go before the roof was on, I could use my backhoe to put them in place. But that meant I had to have the beams, which I didn’t–they were somewhere out in the forest. Fortunately I had a lot of choices for trees to make the beams, as there was one section of my land that was still strewn with blow-downs from Hurricane Sandy.
It is one thing to look at a tree and think it is suitable and another thing to cut it up with a chain saw and find out it is no good. No good because the log is hollow or has some decayed wood. My first three attempts proved unsuccessful and I was annoyed. You want to find a tree that is big enough, straight, no knots and still alive. Even though a tree is lying on the ground, many of them still had leaves as their root balls were partially attached to the ground. Live trees are less likely to have started to decay and have fewer insects attacking them. The next trip back to the woods proved successful and I dragged out a few options for the 8×8” beams. The 4×4” were much easier to find and deal with.
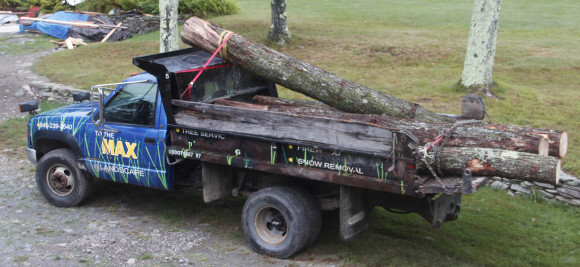
Once I had my logs out of the woods I needed to get them cut up and that meant getting them to Bandsaw Bob’s Sawmill. Robert was 12 miles away and I had “The Max”- a 4×4, one ton, 350 Detroit diesel dump truck that could handle the load, but it had no plates. Do I risk it and take the back way–a seasonal road over the spine of the mountain–or hire Robert to pick-up and deliver the logs? Robert would prefer I do the hauling; he has helped me out before but I didn’t want to go knocking too often—my need might be more urgent next time. The last time I took this clandestine trip with the lightning strike cherry logs, The Max almost didn’t make it back. I was so nervous I thought I was going to throw-up on that trip. Since then I have repaired the truck, but still–it’s a rusty 1996 and doesn’t get used that often.
So early one fall morning at 7 a.m., with my heart pounding and a pit in the bottom of my stomach, I took the chance and headed down my mountain road with a load of logs. At the bottom of the mountain I had to go onto a more frequently traveled road. At the intersection, the coast was clear and I made the risky ¾ mile jaunt before I turned up the mountain road that took me to Bandsaw Bob’s. That all went fine and I didn’t run into any other cars, but on the way down his mountain toward the mill I became concerned about the brakes–smoke was coming from somewhere and there was a strong smell of burning brake pads. The brakes were one thing I had made sure were working properly when I originally bought the truck; I had spent about a thousand bucks on getting them tip-top. I didn’t want to attract any attention but I had to take it much slower, keeping it in 4×4 low and using the engine backpressure to slow me down. The brakes worked but they were hot! I made it to the sawmill undetected.

“The Max” is ready for the return trip. Loaded with Maple beams and some additional 1x White Pine for siding I bought from Robert.
The seasonal road that goes over the mountain spine is one lane and hugged by trees. As luck would have it, on the way back, I ran into two huge Town Highway trucks that were working on getting the road in shape. Luck can go two ways and fortunately for me, each time I ran into a truck, there was a small area in the forest for me to pull over, leaving just enough room for them to squeeze by. Otherwise I would have had to back up for who knows how far to let them pass me by. Whew! I made it safely home with my new beams.
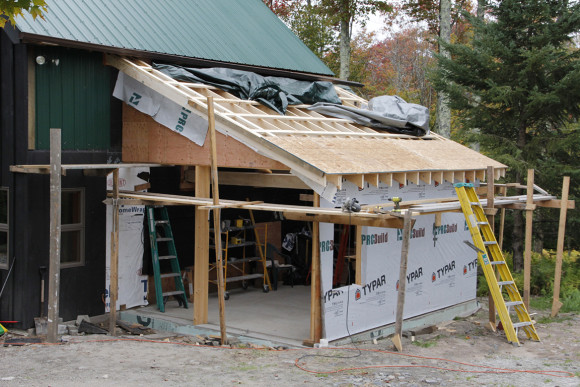 By the middle of October, I had the roof on, things were looking good, and I raised the bar to get the siding on before winter. About the same time, the Pope came to town and for my real job as a TV cameraman, I had to chase after him one night working for Inside Edition. We didn’t have the right credentials so I never saw the Pope, but not wanting to go back empty-handed, the producer got the bright idea to interview Bernie Kerik– the fallen former NYC Police Commissioner–and get his comments on protecting the Pope and terrorism. Problem was he was on the East Side and we were on the West Side. I said let’s drive and she said we wouldn’t get there in time because of road closures. I disagreed to no avail. So we walked south maneuvering around all the barricades, fighting the crowds, then back up North. Me, with a 30-pound camera and bad hips no less. We got the interview and then had to walk all the way back to where our vehicle was parked on the West Side. The next day I wasn’t working and left my apartment to go somewhere. I had to turn back. I could not walk–my left hip just wouldn’t let me. It locked-up. This had never happened before. I struggled back to the apartment, got on the phone and scheduled an appointment with my hip surgeon. I said I wanted hip replacement surgery as soon as possible, wanting to be able to travel for the Christmas Holiday. They had a cancellation for November, Friday the 13th. I laughed and said, “Perfect!”
By that afternoon, my hip loosened up and I was able to walk-limp around. This changed things as far as my construction timeline. Two of the three bedroom windows were in but I still hadn’t ordered the final big 6×4’ window. That window was the next thing on the agenda, but it wouldn’t arrive for four weeks. It was too late; that would be just when I was going under the knife. I cancelled that idea.
But I was able to get the bedroom almost completely sided and I put a temporary door where the window was to go. This temporary door was the only way to get in. I did not want to break down the wall and put a door into the house as the new bedroom was not yet insulated.
So things worked out all right. I got the house to a point that made sense form a selling point of view- it was now a two-bedroom, two-bath house. Just in case anything happened to me during surgery, I did not have to worry about Deb trying to explain my dream to a realtor or anyone else.
December 2015
